This guide will show you how to properly set up and start using your CloudOBS plan.
What do you get
After you purchase a selected CloudOBS plan you gain access to three things:
CloudOBS RDP
A remote desktop with OBS pre-installed. Powered by Nvidia or Intel B70 GPUs on our high-speed network, our servers handle all the heavy video encoding for you.
AIO Relay
An All-In-One relay that lets you send a raw live feed from your phone, camera, or encoder directly to our servers via RTMP, SRT, or SRTLA protocols.
Bohemka BOT
Included with every plan, this custom bot helps you effortlessly manage your IRL stream. Read more here.
Step-by-Step Setup
Step 1: Get AIO Relay details
Log into your billing panel and select your Cloud OBS service.
Click the Connection button.
In the Connection Details window, note your RTMP or SRT/SRTLA details (Full URL and Stream Key). [Read this blog to see how to use AIO Relay]
Step 2: Get RDP details
On that same page, look under the Cloud OBS Settings menu and click the Connection tab. Here, you will find the RDP Address, Username, and Password needed to access your remote desktop.
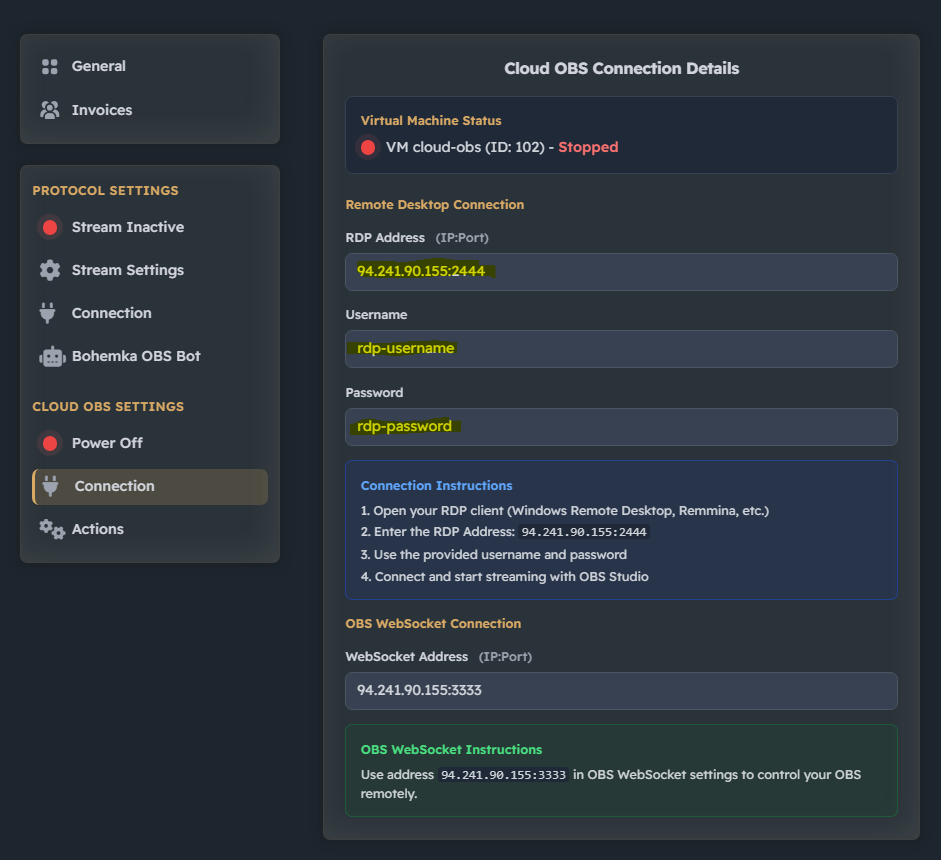
If you see "Setting up..." instead, please wait till admins setup your machine, it is done within 24 hours.
Step 3: Connecting to the RDP
Before connecting, go to the Actions tab and click Start VM to boot up your machine.
If you are on Windows, open the Remote Desktop Connection app.
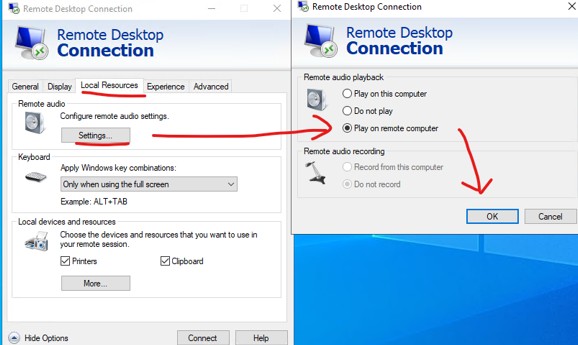
Click on Local Resources, under the Remote audio tab select Settings and choose Play on remote computer
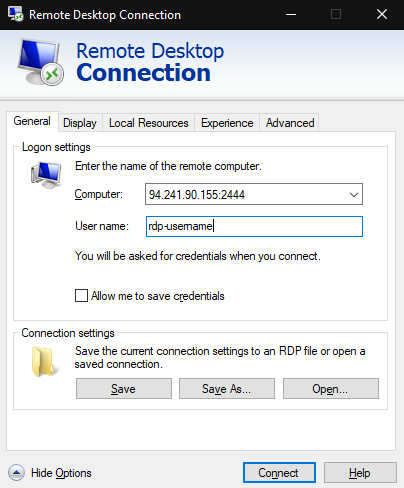
Enter your RDP Address and username under General tab and click Connect.
When prompted, enter the password from your Cloud OBS details.
Step 4: Start OBS
You are almost done! Open OBS on your remote desktop and set up your scenes (or import your settings from home) and start streaming!